Tuesday, December 31, 2013

Chocolate Fudge Crackle Cookies


This Chocolate Fudge Crackle Cookie recipe is my all time favourite recipe to use during my Christmas baking. It's the cookie that gets even more raves than the Peanut Brittle Cookies! These are just so good! They are also good for freezing if you don't eat them right away (which is very hard to do, trust me).

This too, comes from 'The Love of Baking' recipe book from www.robinhood.ca. Lets get to it!

Prep Time: 15 mins + refrigeration I Bake Time: 13 mins per sheet I Makes: 48 crackles

¼         cup (50 mL) Crisco All-Vegetable Shortening
1          cup (250 mL) semi-sweet chocolate chips
¼         cup (50 mL) granulated sugar
2          eggs
2/3        cup (150 mL) Eagle Brand Regular or Low Fat Sweetened Condensed Milk
1          tsp (5 mL) vanilla extract
½      cups (375 mL) Robin Hood All-Purpose Flour
½         tsp (2 mL) baking powder
¼         tsp (1 mL) salt
1 ½      cups (375 mL) Chipits Milk Chocolate Chips
¾         cup (174 mL) icing sugar

Directions:

1. Preheat oven to 325oF (160 oC). Line two baking sheets with parchment paper.

2. In a glass bowl in microwave, melt shortening and semi-sweet chocolate chips on Medium (50%). Add in sugar and then eggs one at a time, stirring well after each addition. Let cool 5 minutes.

3. Mix in sweetened condensed milk and vanilla. Add next four ingredients; mix well to combine. Cover with plastic wrap and refrigerate for 1 ½ hours up to 8 hours.

4. Sift icing sugar in a shallow bowl. Between palms of hands, roll pieces of chilled dough to form 1 ¼" (3 cm) balls. Drop balls in icing sugar and toss lightly until well coated. Place on prepared baking sheets and flatten very slightly. Repeat with remaining dough and remaining icing sugar, spacing about 1 ½" (4 cm) apart.

5. Bake each sheet in preheated oven for 11 - 13 minutes or until just beginning to feel firm when pressed in centre. Let cool on baking sheet on wire rack for 5 minutes. Transfer crackles to wire racks to cool completely.


I really hope you enjoy these cookies as much as we do here. Let me know how you like them!

Enjoy!

Monday, December 30, 2013

Homemade Peanut Brittle Cookies


This is one of the recipes I used when I did my holiday baking and I have used this particular recipe since I started doing holiday baking with my sister years ago. It always gets rave reviews. The recipe itself comes from a small recipe book called 'The Love of Baking' from www.robinhood.ca. Actually, most of my holiday baking recipes come from this book. I can't recall exactly where I picked up the book from, but I'm sure you can find this recipe and more on their website. But let's get things started.

Prep Time: 10 mins I Bake Time: 12 minutes per sheet I Makes: 44 Cookies 

½       cup (125 mL) Crisco Golden All-Vegetable Shortening
½       cup (125 mL) light brown sugar, packed
¼       cup (50 mL) granulated suger
1        tbsp (15 mL) vanilla extract
1        egg
1 ¼    cup (300 mL) Robin Hood All Purpose Flour
½       tsp ( 2mL) each; baking soda and salt
1        pkg (300 g) Chipits REESE Peanut Butter Chips, divided
1        cup (125 mL) Chipits SKOR Toffee Bits
¾       cup (175 mL) unsalted peanuts

Directions:

1. Preheat oven to 350oF (180oC). Line baking sheets with parchment paper.

2. In a large bowl, beat shortening with sugars and vanilla until creamy. Beat in egg. Add flour, baking soda and salt, mixing until incorporated. Stir in 1 cup (250 mL) peanut butter chips, all toffee bits and all peanuts.

3. Drop mixture by rounded tablespoons (15 mL) onto prepared baking sheets, about 2" apart.

4. Bake each sheet in preheated oven 10 - 12 minutes or until deep golden brown and just set. Cool on sheet for 3 minutes. Remove to wire racks and cool completely. Melt remaining peanut butter chips in microwave on High for about 45 seconds. Drizzle over cooled cookies.

These really are delicious, however, I do not drizzle the remaining peanut butter chips on the cookies as I skip this step. I just don't think it's necessary because the cookies are already so good without it, not to mention that it was very messy the first time I did it.

These cookies also freeze really well so you can bake early and freeze until you really need them. Just remember to label that freezer bag.

Happy baking!

Sunday, December 29, 2013

Holiday Gift Idea's

This year I have two holiday gift idea's to share. The first one is a gift box that I put together for a lovely colleague of mine and the second one is related to all my holiday baking.

You may recall my gift idea from last year, so the first idea follows along the same lines.

My colleague is actually on the same training team I'm on and I consider us to be pretty good work friends. We laugh, we share, and our love for Starbucks seems to be growing together. We both have a thing for London Fogs (or Earl Grey Tea Latte's as Starbucks calls them), so I based her gift on that fact.

I bought a pretty pink gift box from Target for only $4.99 and then filled it with items she needs to make a London Fog at home. She is also new to baking so I included some home made cookies and her very first cookie scoop (she laughed at that one). Here's how it turned out.


The jingle bells on top of the gift is from Target.


The second gift idea was for Eric's daycare provider and included a lot of baking on mine and my sister's part. We typically have a baking day at my place every Christmas but unfortunately the year the weather spoiled our plans so we had to do our baking on our own. We made cookies, squares, chocolate bark, and shortbread. All delicious, since I tried at least of couple of everything :)

I then picked up a cute container from the dollar store, added some tissue paper and filled it with goodies. I also attached a really cute label I got from Sweet Metel Moments. Rehana (our day care provider), absolutely loved it and it was all home made so it's very touching for someone to receive gifts like this. I'll post some of the recipes we used soon!


The other good thing about these gifts is that they are great gifts for any time of the year and for any occasion.

Happy gift giving!

Holiday Home Tour 2013

Good morning, and welcome to our home!

I am pleased to give you a tour of how I decorated for Christmas this year. I didn't get to do as much as I had wanted to due to my husband travelling, but I am happy with what I did manage to get done. I hope you enjoy.

Front Entrance:
 

Our front entrance is all about simplicity. I do the garland and red bows on the railings every year and also add a wreath to our front door. This wreath is new this year since a leak in our garage ruined the other one we had. This one is from Target. I also added a nice potted plant in front, which is from Canadian Tire.

Our Living Room:


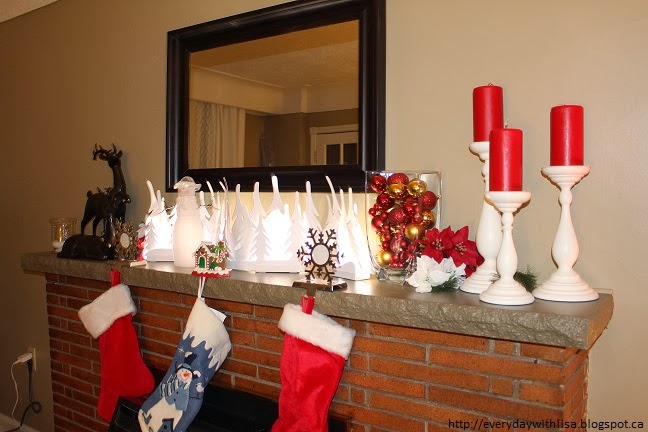
I decorate our mantel every year and try to do something different each time. This year I added these beautiful dear I picked up at Costco. My sister Shannon gave me this home made snow globe on Christmas day (she's very crafty) and it is a nice touch to the mantle.

Then there is our tree. We actually put it up by our patio door because it has the most space available. We then like to put all of the Christmas cards we receive on the bookshelf beside it.

I didn't get to do much else around the house this year, but I did manage to put a few small items in our basement. We have a big screen TV there so I just put a couple of items on either side of it on the TV stand. 
 

The first photo is a black decorative bowl with sparkly balls inside placed next to a picture of our nieces and a foam tree that Eric made last Christmas.

The second picture is a grey vase with sparkly floral pieces. I think placing photo's around it give it a really nice touch.

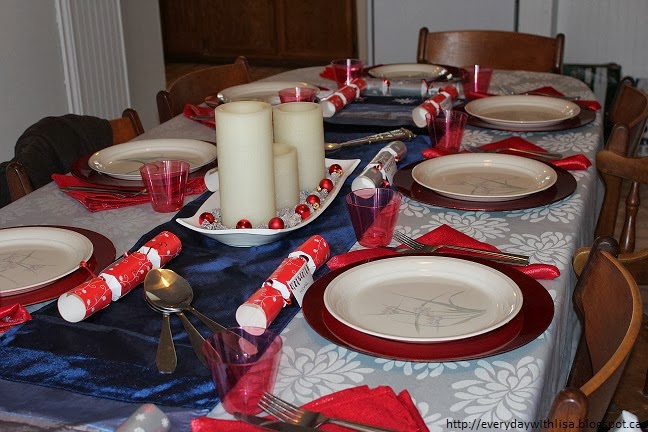
The last thing I'd like to share is our dining room set-up that I put together for Christmas dinner. It turned out beautifully. We had 10 adults and three kids over for Christmas dinner. It was lovely.


I hope you enjoyed this small home tour. I am already excited about going bigger and better for next year.

Happy New Year!

Wednesday, December 25, 2013

Merry Christmas!

From my family to yours, I wish you a very Merry Christmas and a wonderful New Year.

I hope yours wishes come true and that you are filled with happiness on this day and throughout the year.


Thursday, December 19, 2013

A Quick Update

Well, it has been several weeks since I've been able to post anything; and I feel so guilty inside!

However, I can now come back in full swing - but let me give you a slight update first.

My company Holiday Party was on November 30th, and you may recall that I had been busy planning. However, the week before the party my husband had to go away for work (for two and a half weeks!), so I was on my own with Eric while trying to finish all the party details. Let me tell you, it was pretty challenging to say the least. The party itself was a great success and everyone had a great time, but I was literally left with no time to keep up with my blog.

During the time Doug was away, Eric was a pretty good boy but man, does he ever drag out bedtime. After working an 8 hour day, coming home and making dinner and then struggling for an hour and a half to get your toddler to bed just wore me right out.

So, I really apologize for the lack of posts these past few weeks and I promise I'll make it up to you. I have posts planned for gift idea's, Christmas baking and so much more!

Happy Holidays!

Friday, November 22, 2013

It's Friday!

It's Friday - time to celebrate the weekend! I hope you had a great week. It's actually been pretty busy this week, but luckily for me I am off today! I have an late morning appointment then am hoping to go get a manicure. Doug will be at work and Eric in daycare so it will be nice to get a little me time.

So, thanks for joining me as I link up with Lauren and round up my top five moments of the week.

1. I had a coffee meet up with one of the local mom groups in town. There were four of us in total and it was my first time meeting everyone. It was so nice to meet new people and we ended up staying for two hours chatting away about work, life, weddings, and of course, our kids! It was a great night out and I'm looking forward to a lot more meet-ups and play dates.
2. I'm counting down the days to my work's Christmas party. We're just over a week away and things are going pretty smoothly. I love planning events so this will always be high on my list. The vase in the picture is our centrepiece prototype. We're doing that concept, but with more blue. The photo just does not do it justice.
3. We went to one of our favourite places last weekend, Springridge Farms. They have a huge play area, a cafe and bakery, and such a wonderful gift shop. Eric had a blast, plus I was able to pick up a few Christmas decorations from their shop. It was a win-win situation.
4. I got to sleep in today! Doesn't happy very often, folks.
5. This red cup. Need I say more?

Wednesday, November 20, 2013

Chicken and Cauliflower Chili


Do you need an alternate to your regular chili? Well, then I found a recipe for you!

I'm a big ole' chili fan myself, but just the name of this chili was very intriguing to me so I decided to give it a try. Let me tell you - it did not disappoint! It is so good and has a nice little kick to it. I also found it to be a much lighter meal then regular chili, which is also a plus for me.

The recipe itself comes from Foodland Ontario. Foodland Ontario helps Ontarians (and others!) chose fresh, local grown produce, all while supporting local farmers and businesses. There website provides recipes, tips, food facts, and more.

The recipe itself was found in a small recipe booklet that I picked up in the produce section of my local grocery store. Free recipe books are the best, aren't they?

Let's get started.

Prep Time: 15 Mins, Cooking Time: 40 Minutes, Serves: 4 - 5

Ingredients:
2 tbsp          Vegetable or Canola Oil
1 lb               
Boneless Skinless Chicken, cut in 1-inch cubes
2                 
Onions, chopped
3                  
Gloves Garlic, minced
1                  
Sweet Green Pepper, coarsely chopped
3 cups        
Cauliflower Flourets
4 tsp            
Chili Powder (or to taste) - I used 3
1 tsp             
each ground cumin, dried oregano leaves and salt
1                  
can (28 oz/796 mL) diced tomatoes
1                 
can (19 oz/540 mL) red kidney beans, drained and rinsed

1. In a large saucepan, heat oil over medium-high heat; cook chicken, onions and garlic until browned, 5 to 7 minutes. Add green pepper, cauliflower, chili powder, cumin, oregano and salt; cook, stirring for 1 minute.

2. Add tomatoes and beans; bring to a boil. reduce heat, cover and simmer for 30 minutes, stirring occasionally.

I hope you enjoy this as much as we did. I actually made this later in the evening, so I packed a lunch for Doug and I, and then freezed the rest (I will post about freezer cooking a bit later).

Bon appetite!

Tuesday, November 19, 2013

Christmas is in the Air

Well, we're having our first light snow fall of the season - even if it's just a very light dusting. I'm not a big snow person in general to be honest, but I always appreciate the first snow fall. It's just so pretty. Snow on Christmas day is okay in my books too :)

This weather has been something else though. We hit 18 degrees Celsius on the weekend! It was the perfect weather for Doug to hang out Christmas lights and they look so nice. A simple classic line of white lights. Not the first Christmas decorations to go up though. In fact, I wanted to provide a sneak peek of my Holiday decorations.


All candles and the deer are from Costco.

Once I have the house fully decorated, within the next couple of weeks, I plan on giving a 'Holiday House Tour' on what I've done. 

Christmas is my absolute favourite time of year and I am so excited to share it with you!


Saturday, November 16, 2013

Fall Family Photo's

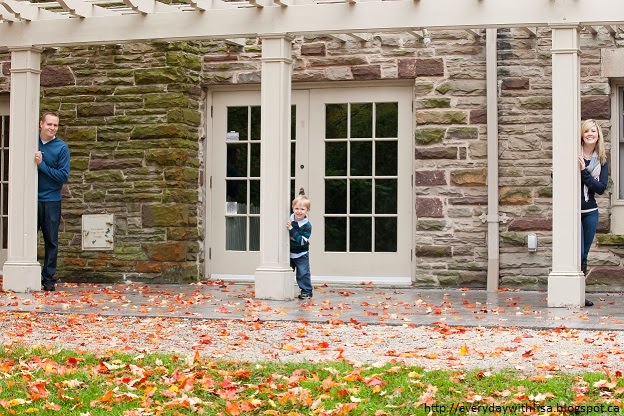
Every year my family gets Fall photo's done and my husband Doug and I are so happy with the way they turned out this year. I think it's important to keep the family's profile up to date so we can pass on the pictures to future generations. Plus, I think it will be good for Eric to have lots of memories for when he's older. 

This was our second year using our fabulous photographer, Charlotte. You can view here website here. I would truly recommend her to anyone. She really knows her stuff and is super good (and patient) with children.

The photo's were taken at Paletta Mansion in Burlington, Ontario back in October. I can't wait to get them framed and use one for our Christmas cards this year.

Hope you enjoy!


*I am in no way affiliated with Charlotte and am not being compensated for this post.

Friday, November 15, 2013

High Five for Friday

Wow, this week has been a lot busier then usual. However, it's still been a good week. Here's my top five for the week.

1. Last Sunday my sister and I did a craft day with my son Eric and nephew Logan ('the boys'). It was so much fun. You can read about our day here.

2. I just bought Michael Buble concert tickets for his show in June in Toronto. I can't wait! There are four of us ladies going so it is sure to be a fun night (even though it's so far away!).

3. I have been attending the Canadian Society of Training & Development (CSTD) Conference since Wednesday. I work as an HR Specialist in Training & Development full-time, and the conference has been very informative and engaging. I'm really learning a lot and am looking forward to putting some of my new knowledge to use and my workplace. I am also connecting with some great people, and that's always a plus.

The only downside is, of course, the commuting from Hamilton to Toronto. I am been taking the training, but it just means I have to be up by 5 am. Not fun, folks.

4. Going along with the above, tomorrow is Saturday and that means I get to sleep in! The weekends are actually really good in that regard. My husband and I each have a sleep in day on the weekend. A little give-and-take does a family good.

5. Last but not least, I bought my dress for my works Christmas party at the end of the month. It's so pretty! I will post a picture soon!

Hope you enjoyed your week!

Don't forget to link up with Lauren!

Tuesday, November 12, 2013

Christmas Craft Day

I know what you're thinking; it's too early to think of Christmas. But to be honest, I start to think about it right after Halloween is done and over with. It's my absolute favourite time of the year; the music, lights, festivities and family events, I just can never get enough. And I've already started my Christmas shopping!

It is November 12th after all, and we're almost half way through the month. My sister Shannon and I decided it was the perfect time to do some Christmas crafts with the boys (my son Eric and my nephew Logan). Oh, we also baked some cookies too.

We did some painting, we made ornaments and reindeer and all around had a good half hour. Short and sweet I always say. Not to mention the boys' attention span was a little short that day. To be honest all they wanted to do was play with their toys, but at least we got some craft time in. I guess my post should be called Christmas Craft Half-Hour, but Christmas Craft Day just sounds so much better. 

Anyway, I wanted to share how are day went. 

This is only part of our supplies. Shannon brought over a bag full of things too.
We started with our popsicle stick Christmas tree's. Eric and Logan were very precise when colouring their popsicle sticks.

 
 Then we moved onto decorating felt Christmas tree ornaments. 
We also did some painting, made hand print reindeer and then made snowman ornaments from their thumb prints. These are Eric's finished crafts.
These are Logan's finished crafts.
 
After the crafts, we had the boys' layout cookie dough on the cookie sheet so we can bake some cookies. We just used the Pillsbury Reindeer Shaped cookies. 
 
After we had finished everything and as Logan was getting ready to go home, I think they were both ready for a nap. Just look at these cute, tired eyes. 

Needless to say, Eric slept for two hours that afternoon.

By the way, did I mention we also listened to Christmas music?

Monday, November 11, 2013

Lest We Forget

Today marks the day we remember those who fought for the freedom that we have today.

To those men and women who made great sacrifices for our great country and to those that still are; today is the one of many that I say, thank you

Let's take this time to remember those who lost their life for everything we have today. Today at 11:00 am, let us give a moment of silence to reflect on our great country's history; all those it involved, and let us always remember how our freedom came to be.

"They shall grow not old, as we that are left grow old:
Age shall not weary them, nor the years condemn.
At the going down of the sun and in the morning
We will remember them."


Lest we forget.

This is my late grandfather, Robert Green. Although he was not a a war time veteran, he served in the navy on the aircraft carrier, Bonaventure.


* The above quote is an excerpt of 'For the Fallen', written by Robert Laurence Binyon. You can read it in it's entirety here.

Friday, November 8, 2013

High Five For Friday!

Happy Friday, friends! 

After the week I've had, I am so happy that today is Friday!

I say this of course because my husband has been travelling all week so it has just been Eric and I. I absolutely love him to pieces, but this week has been way more challenging than I expected! Having said that, this week has had it's highs. Let's get started with my top five.

1. My first one is a two-in-one for me. Since Doug was away this week, Eric and I really have been spending some awesome quality time together. This includes reading stories, cuddling on the cough, colouring and crafting together, and playing with his toys, among other things. I absolutely love spending time with him. 

On the other hand, bedtime has been a nightmare lately so I am so glad Doug is coming home tonight!

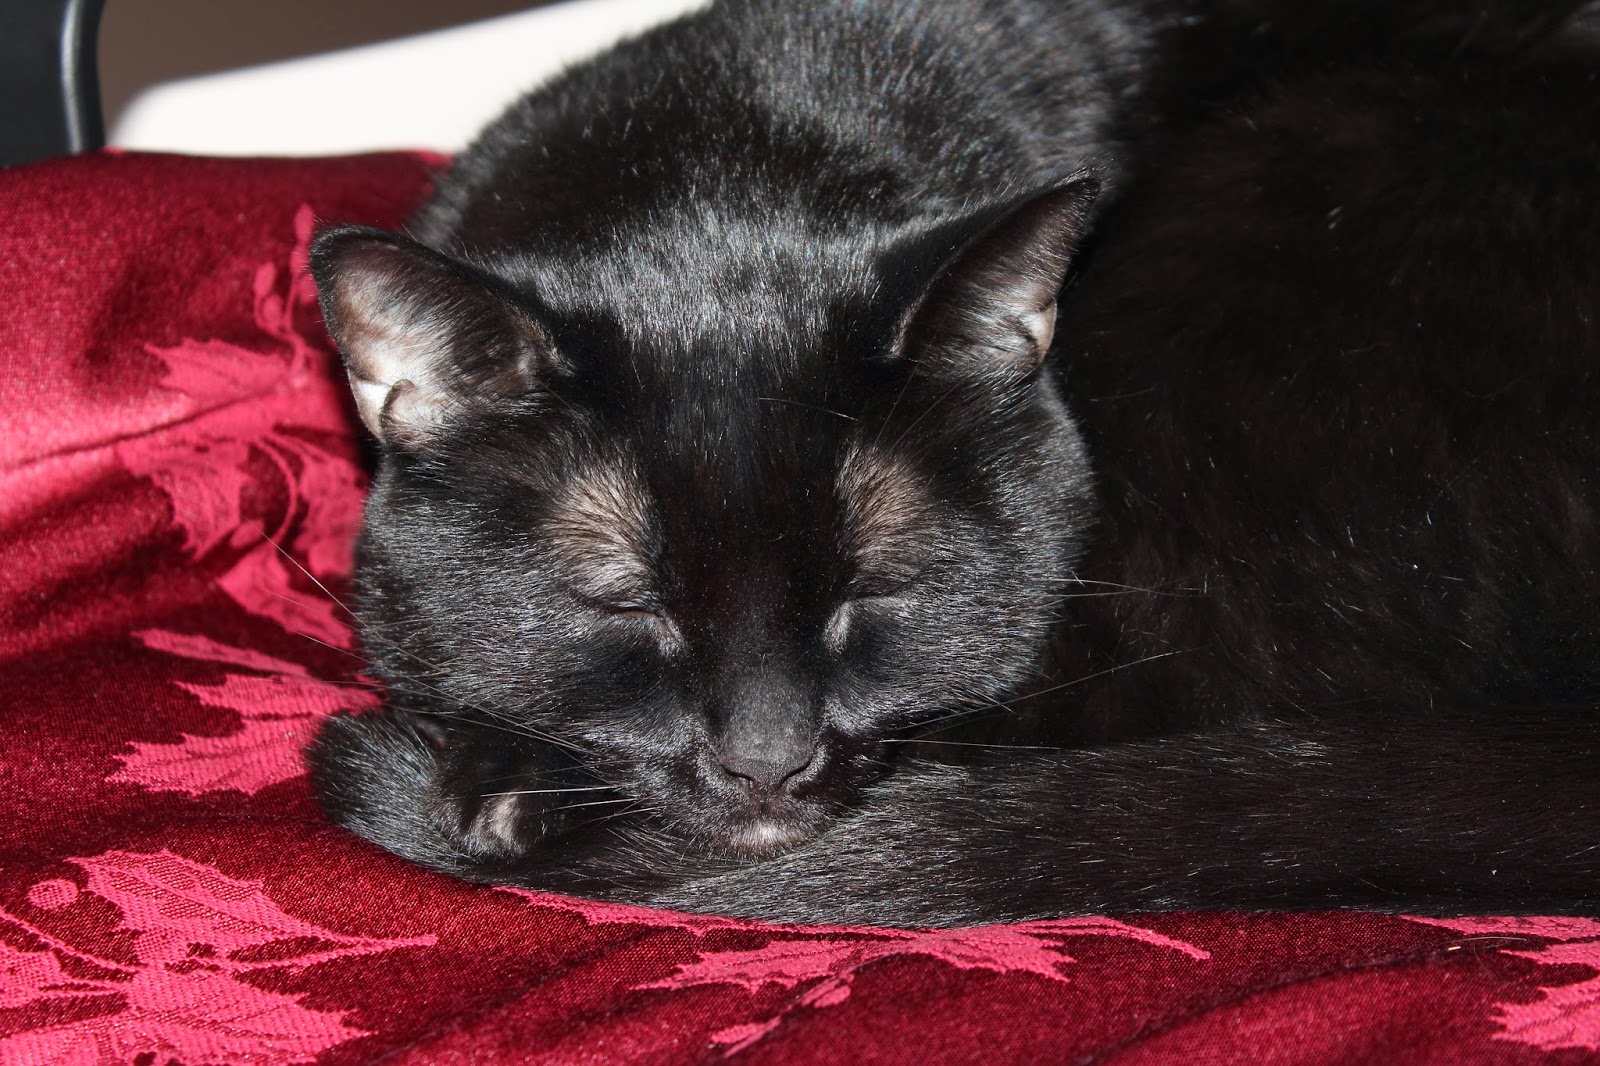
2. My cat Inca has been extra cuddly with me this week. I'm so happy he takes Doug's spot on the bed at night; for some reason it makes me feel safer than if nothing was there at all. He's just so cute, soft, and cuddly. 

This is him on Doug's office chair while I was working on the computer. He likes being in the same room as me. I'm definitely his favourite :)
3. I am planning my works Holiday Party for 500 employees and last Friday we had our food tasting event for our sub-committee. It was amazing. We were treated to the full meal of Wild Mushroom Bisque, Apple Pancetta Stuffed Chicken with Roasted Potatoes and Vegetables, and Hazelnut Chocolate Crème Brulè. Simply Delicious. I cannot wait for the party at the end of the month.

You might not know this, but I love to organize and plan events. This will be my second year in a row planning the Holiday Party and I'm actually currently taking a course on Wedding and Event Planning. My dream job is to be an Event Planner so I am working to make that happen.

4. I organized my utensil drawer. I know, not really that exciting but I am just so happy with it. I have a problem I know, but you can read about what I did here.

5. Tonight my sister and I are going for pedicure's and appetizer's. A much needed break for me and not to mention much needed quality sister time. I just love nights like that.

Hope you had a good week too! 

Linking up with Lauren!

Thursday, November 7, 2013

Organizing Your Utensil Drawer

Thanks to Alejandra from Alenjandra.tv, I have discovered an awesome new way to organize my utensil drawer! I probably shouldn't be so happy about organizing utensils, but it has been fabulous not having to search for the items I need. It's all at my fingertips - literally.

The product is DrawerDecor by KMN Home and retails for about $29.99. I picked mine up at Solutions.
The DrawerDecor system is actually a relatively new product of theirs, only launched about a year ago. The kit itself contains a silicone base with small dividers that all work together to keep your utensils in place. Even as you open and close the drawer, they just wont budge. They are also very easy to clean with only a damp cloth.
They have a few colours to chose from, but as soon as I seen it in blue, I knew I had to have it given that it's my favourite colour.

One of the great things about this product is that you can cut the mat down to size to fit your drawer, which is what I had to do. And although you can absolutely fit more utensils in your drawer without this, you don't have to fight to get the drawer open or have to move several things around to get to what you need. Once I bought the DrawerDecor it actually made me realize that I had way too many utensils in my drawer, a lot of which I didn't use or that I barely used, so I was able to purge a lot of the items.

Here's my before and after.

I really can't believe the difference. It just looks so pretty that I could almost stare at it all day. I just love the pop of blue.

I would really recommend this product to anyone. If you happen to pick it up or are currently using it, let me know what you think.

Oh, and be sure to check out Alejandra's website for some awesome organizing tips and video's!

Happy organizing!

*This post is of my own opinion and I am in no way affiliated with KMN Home or Alejandra.tv.