Showing posts with label Recipes. Show all posts

Tuesday, October 6, 2015

The Best Ever Strawberry Jam


Since I've been home with Andrew, I've really been enjoying the time I get to spend at home. From just spending time with him, to baking, cooking, and sometimes catching up with my PVR, one thing I never get tired of is making jam (and that usually happens when jam goes on sale!). I'm so happy to share this recipe with you!

Seriously, this stuff is so amazing! 

It makes 8 jars; but trust me - they won't last long!

Here's the tools that you'll need:

- 8 x 250 ml jam jars with lids
- Tongs
- Sm. pot
- Lg. Pot
- Measuring cup
- Potato masher
- Knife
- Oven Mitts
- Large Bowl
- Funnel (optional)

Ingredients:

4          1 lb containers of fresh strawberries
¼         cup of lemon juice
7          cups of sugar
1          package of liquid pectin

Directions:

1. Preheat oven to 225 degrees, and while waiting for the oven to heat, wash and core the strawberries.

2. Place the jars (without lids) in the oven for 10 minutes and then turn off, leaving the jars in the oven until needed. This will sterilize them and help keep them warm for the canning process.


3. Place the jar lids into a small pot of boiling water and boil for 2 minutes, then turn off the heat. Leave the lids in the pot until needed.


4. Put the strawberries in a large pot, several at a time, and use the potato masher to mash them all up. You want to ensure there are no large chunks and have the consistency and look of strawberry salsa.


5. Once you have crushed all the strawberries, measure out ¾ cups. Be sure to be as accurate as possible here, or you may throw off the recipe! I used the bowl I put the cut strawberries in for the amount needed, and saved any extra of later use (they make a good ice cream topping!), and just poured the correct amount back into the pot.

6. Turn on high heat and add in the lemon juice and sugar, then stir, sir, stir! You'll want to bring the strawberries to a rolling boil. Once at a rolling boil, continue to boil for one more minute.


7. Remove the pot from the heat and add the liquid pectin, stirring continuously for five minutes. Once you're done stirring, skim off the foamy part of the jam.


8. Pour the jam directly in the warmed jars (be sure to use gloves, the jam is super hot!). You can pour directly in the jar or use a funnel like I do (it's so much easier with one). Be sure to leave ¼ inch room at the top of the jars to allow for sealing.


9. Place the lids on and screw tight! 


10. Allow the jam to cool for 20 - 30 minutes on a cooling rack, then poke the top-middle part of the lid. You'll hear a 'pop', which is a sign that the sealing worked.


After a couple of hours, you'll start to notice the thickening of the jam which is when it's good to eat! The jam will store in the pantry for up to a year, but like I said before, they won't last that long.

These also make great gifts for friends and family, and you can even make pretty labels like I did.


I'd love to hear how your jam turned out. Let me know in the comments below.

Enjoy!


Disclaimer: Original recipe can be found here. Reposted with permission.

Monday, March 30, 2015

Healthy Chickpea Salad


Spring is finally here so I thought I'd share one of my favourite salad recipes. It's healthy, delicious, and it just screams Spring (and Summer!). The original recipe is from allrecipes.ca but I have modified it and made it my own. 

The best part? It only takes 15 minutes to make!

Servings: 6

2          (19 ounce) cans chickpeas, drained and rinsed
1          pint of cherry tomatoes, halved
1          cucumber, cut into small chunks
2          tbsp. of basil
2          tbsp. of honey
3          gloves of garlic, minced
3          tbsp. of red wine vinegar
3          tbsp. of olive oil
½         tbsp. of pepper
¼         tbsp. of salt
Other fresh vegetables of your choice

Directions:

1.     In a large bowl, combine the chickpeas, tomatoes, cucumber, and basil. If you are adding any other vegetables you can add them here as well.

2.     Put honey in a small glass bowl; heat in microwave for 30 seconds. Stir garlic, red wine vinegar, olive oil, black pepper, and salt with the honey to make a dressing; pour over the chickpea salad and toss to coat. 

Be careful when removing the honey from the microwave; it’s hot!

3.     Serve immediately or cover and refrigerate for later use. This salad will keep for up to three days.

It's oh-so-delicious - I hope you enjoy!

Wednesday, April 16, 2014

Baked Avocado & Egg Breakfast

You might have seen this recipe all over Pinterest, but it looked so delicious that I had to try it for myself. And while I was worried it would be one of the grossest things I've had had, it was pleasantly delicious!

For one serving, all you need is one avocado, two eggs, and the spices of your choice (I used salt, pepper, and a little basil). For one half I sprinkled a little Parmesan cheese on top. So good!

Simply cut the avocado in half, remove the pit, scoop out excess avocado to make a little 'bowl', and and crack an egg in each piece and add the spices of your choice. Bake at 350 degrees for about 25 minutes (cooking times may vary, but long enough for the egg to fully cook).

I would suggest using a larger avocado or the egg will spill over.


If you haven't tried this yet, I would highly encourage you to. It's super healthy and delicious (especially when you add a little tomato on the side)! 

Enjoy!

Tuesday, January 7, 2014

Leftover Turkey Soup

This winter has been the first 'real' winter we've had in several years. We've been spoiled with higher than normal temps in the past so I think Mother Nature came back with a vengeance! We have more snow this year than I can ever remember. Lucky for us though, it has led me to try my hand at making homemade soups, which I have been doing a lot of lately. I'm a true believer that one of the best things about the cold weather is having a nice hot bowl of something (chili, soup, etc.). Don't you agree?

So, since we hosted Christmas dinner this year I had a boat load of turkey left and decided to come up with my own leftover turkey soup recipe. I'm happy to say that it turned out delicious so I thought I'd share.

Prep time: 20 mins I Cook Time: 1.5 hours I Servings: 10 - 12 

2          tbsp. of butter
1          onion, diced
1          cup of chopped carrots
1          cup of chopped celery
1          tsp. of garlic powder
2          cans (398 mL) of diced tomatoes
2          cartons (900 mL) of chicken broth
4          tbsp. of dried parsley
2          tsp. of salt
4 – 5   cups of chopped leftover turkey
1          cup of elbow macaroni


Directions:

1. Melt butter in a large pot over medium heat. Add onion, celery, carrots, and garlic powder; saute for a few minutes.


2. Add diced tomatoes, chicken broth, parsley, salt, and turkey to the pot. Bring to a boil, cover, and reduce heat. Simmer for approximately 1 hour until vegetables are barely tender.

3. Add the elbow macaroni and simmer for 30 minutes more. Serve or freeze for later consumption.


This soup pairs nicely with warm bread and butter. Enjoy!

----------------------------------------------------------------------------------------------------------------------------------

I'm combining this post with the Inspire Me Blog Challenge 2014 hosted by Showered With Design and Happiness is a Mood Not a Destination. Today's prompt is: When is your birthday?

My birthday is July 1st. I celebrate my birthday with Canada, and as a proud Canadian, I think that is really awesome. Not to mention that it's also a long weekend :)

Tuesday, December 31, 2013

Chocolate Fudge Crackle Cookies


This Chocolate Fudge Crackle Cookie recipe is my all time favourite recipe to use during my Christmas baking. It's the cookie that gets even more raves than the Peanut Brittle Cookies! These are just so good! They are also good for freezing if you don't eat them right away (which is very hard to do, trust me).

This too, comes from 'The Love of Baking' recipe book from www.robinhood.ca. Lets get to it!

Prep Time: 15 mins + refrigeration I Bake Time: 13 mins per sheet I Makes: 48 crackles

¼         cup (50 mL) Crisco All-Vegetable Shortening
1          cup (250 mL) semi-sweet chocolate chips
¼         cup (50 mL) granulated sugar
2          eggs
2/3        cup (150 mL) Eagle Brand Regular or Low Fat Sweetened Condensed Milk
1          tsp (5 mL) vanilla extract
½      cups (375 mL) Robin Hood All-Purpose Flour
½         tsp (2 mL) baking powder
¼         tsp (1 mL) salt
1 ½      cups (375 mL) Chipits Milk Chocolate Chips
¾         cup (174 mL) icing sugar

Directions:

1. Preheat oven to 325oF (160 oC). Line two baking sheets with parchment paper.

2. In a glass bowl in microwave, melt shortening and semi-sweet chocolate chips on Medium (50%). Add in sugar and then eggs one at a time, stirring well after each addition. Let cool 5 minutes.

3. Mix in sweetened condensed milk and vanilla. Add next four ingredients; mix well to combine. Cover with plastic wrap and refrigerate for 1 ½ hours up to 8 hours.

4. Sift icing sugar in a shallow bowl. Between palms of hands, roll pieces of chilled dough to form 1 ¼" (3 cm) balls. Drop balls in icing sugar and toss lightly until well coated. Place on prepared baking sheets and flatten very slightly. Repeat with remaining dough and remaining icing sugar, spacing about 1 ½" (4 cm) apart.

5. Bake each sheet in preheated oven for 11 - 13 minutes or until just beginning to feel firm when pressed in centre. Let cool on baking sheet on wire rack for 5 minutes. Transfer crackles to wire racks to cool completely.


I really hope you enjoy these cookies as much as we do here. Let me know how you like them!

Enjoy!

Monday, December 30, 2013

Homemade Peanut Brittle Cookies


This is one of the recipes I used when I did my holiday baking and I have used this particular recipe since I started doing holiday baking with my sister years ago. It always gets rave reviews. The recipe itself comes from a small recipe book called 'The Love of Baking' from www.robinhood.ca. Actually, most of my holiday baking recipes come from this book. I can't recall exactly where I picked up the book from, but I'm sure you can find this recipe and more on their website. But let's get things started.

Prep Time: 10 mins I Bake Time: 12 minutes per sheet I Makes: 44 Cookies 

½       cup (125 mL) Crisco Golden All-Vegetable Shortening
½       cup (125 mL) light brown sugar, packed
¼       cup (50 mL) granulated suger
1        tbsp (15 mL) vanilla extract
1        egg
1 ¼    cup (300 mL) Robin Hood All Purpose Flour
½       tsp ( 2mL) each; baking soda and salt
1        pkg (300 g) Chipits REESE Peanut Butter Chips, divided
1        cup (125 mL) Chipits SKOR Toffee Bits
¾       cup (175 mL) unsalted peanuts

Directions:

1. Preheat oven to 350oF (180oC). Line baking sheets with parchment paper.

2. In a large bowl, beat shortening with sugars and vanilla until creamy. Beat in egg. Add flour, baking soda and salt, mixing until incorporated. Stir in 1 cup (250 mL) peanut butter chips, all toffee bits and all peanuts.

3. Drop mixture by rounded tablespoons (15 mL) onto prepared baking sheets, about 2" apart.

4. Bake each sheet in preheated oven 10 - 12 minutes or until deep golden brown and just set. Cool on sheet for 3 minutes. Remove to wire racks and cool completely. Melt remaining peanut butter chips in microwave on High for about 45 seconds. Drizzle over cooled cookies.

These really are delicious, however, I do not drizzle the remaining peanut butter chips on the cookies as I skip this step. I just don't think it's necessary because the cookies are already so good without it, not to mention that it was very messy the first time I did it.

These cookies also freeze really well so you can bake early and freeze until you really need them. Just remember to label that freezer bag.

Happy baking!

Wednesday, November 20, 2013

Chicken and Cauliflower Chili


Do you need an alternate to your regular chili? Well, then I found a recipe for you!

I'm a big ole' chili fan myself, but just the name of this chili was very intriguing to me so I decided to give it a try. Let me tell you - it did not disappoint! It is so good and has a nice little kick to it. I also found it to be a much lighter meal then regular chili, which is also a plus for me.

The recipe itself comes from Foodland Ontario. Foodland Ontario helps Ontarians (and others!) chose fresh, local grown produce, all while supporting local farmers and businesses. There website provides recipes, tips, food facts, and more.

The recipe itself was found in a small recipe booklet that I picked up in the produce section of my local grocery store. Free recipe books are the best, aren't they?

Let's get started.

Prep Time: 15 Mins, Cooking Time: 40 Minutes, Serves: 4 - 5

Ingredients:
2 tbsp          Vegetable or Canola Oil
1 lb               
Boneless Skinless Chicken, cut in 1-inch cubes
2                 
Onions, chopped
3                  
Gloves Garlic, minced
1                  
Sweet Green Pepper, coarsely chopped
3 cups        
Cauliflower Flourets
4 tsp            
Chili Powder (or to taste) - I used 3
1 tsp             
each ground cumin, dried oregano leaves and salt
1                  
can (28 oz/796 mL) diced tomatoes
1                 
can (19 oz/540 mL) red kidney beans, drained and rinsed

1. In a large saucepan, heat oil over medium-high heat; cook chicken, onions and garlic until browned, 5 to 7 minutes. Add green pepper, cauliflower, chili powder, cumin, oregano and salt; cook, stirring for 1 minute.

2. Add tomatoes and beans; bring to a boil. reduce heat, cover and simmer for 30 minutes, stirring occasionally.

I hope you enjoy this as much as we did. I actually made this later in the evening, so I packed a lunch for Doug and I, and then freezed the rest (I will post about freezer cooking a bit later).

Bon appetite!

Sunday, October 20, 2013

Homemade Vanilla Extract

With Christmas just over 5 weeks away, I am seriously starting to think of gift idea's for the many people in my life (you really wanted that reminder, didn't you?). Along with the gift-giving that comes along with Christmas, there is also the many dinners and parties you'll attend. In either case, wouldn't homemade vanilla extract be a wonderful gift idea for your family, friends and colleagues? Homemade gifts are really awesome and many people really love things that comes from the heart. It's within the meaning of Christmas after all.

Thanks to Bethany Actually (whom I found on Pinterest) and a couple of other online sources, I found out that making your own vanilla extract is actually super easy! 

Here's what you'll need: 
  • Vanilla Beans
  • Vodka, any brand and can be inexpensive. I used Absolut Vodka.
  • Glass bottles with lids
  • Measuring cup
  • Funnel
  • Knife
  • Cutting board
  • Paper Towels
  • Ribbon or twine (optional)
For the vanilla beans themselves, I bought mine through eBay from Vanilla Products USA and used Grade B Bourbon Planifolia Vanilla Beans grown in Madagascar. The service and delivery time were pretty good and I would purchase from them again. It costs about $24 (including shipping) for 30 beans.

For the glass bottles I used, I used 4 oz. Boston Round bottles purchased from Uline, which is located in Brampton, ON. You will need to purchase a case of 24 as a minimum. They were about $30 for the case.
First and foremost, be sure to wash your bottles and lids with hot soapy water and then let them air dry.

Using your sharp knife, cut your bean in half. Then, about a half inch down from the end slice the bean in half lengthwise.

Once you have all your beans cut and ready to go (I used all 30 of mine for 12 bottles), put 5 pieces (two and half full beans) of bean into your glass yours. If you have any extra pieces (I had one), just add it to a jar.

Once your jars are full of beans, you ready to pour the vodka. Add half cup of vodka to each bottle ensuring that the beans are fully covered.
Your funnel likely wont stay still on it's own so be sure to hold the funnel while your pouring in the vodka.
After adding the vodka, simply screw on the caps tightly and you're done! You can see the vodka starting to change colour almost instantly.

Important care instructions: Be sure to store these in a cool dry place. From what I read online, the vanilla will be good to use in about two months time. Just be sure the give the bottles a gentle shake a few times a week.

After the vanilla is ready you can remove the beans or leave them in, just note that the vodka will evaporate over a long period of time. In this case, simply top up the vodka to ensure the beans stay covered.


Since these are Christmas gifts, I went a step further and created these labels using MS Publisher. I followed the same label idea as Bethany Actually. Ingredients listed is love, vodka and vanilla beans. A sweet touch for your friends and family.

In my case I only labelled 6 as I will likely keep a couple bottles for myself with all the baking I do, but also because I'll be including a bottle in my Secret Santa gift at work and will create a more generic label for that (will post about this gift idea sometime in November).

Since the vanilla takes about two month's to be ready, you can also add a 'Best After Date' to your label or simply add that piece of info in your card (assuming you give them one).


I'm pretty happy with the way they turned out. The picture below shows how the colour changed in only a 24 hour period. They'll eventually be very deep amber in colour.
You can also dress up the bottles with ribbon or twine for a nice added touch.
I hope you enjoy making your vanilla as much as I did! Feel free to comment below with any questions, etc.

Good Luck!

Monday, October 7, 2013

Homemade London Fog

Okay, so back in the summer I was introduced to a drink called London Fog; you may have heard of it. It's an earl grey tea latte with steamed milk and vanilla syrup. I was a bit hesitant  to give it a try at first because I am not a big risk taker when it comes to drinks, and I'll be honest, I love my Tetley Tea! However, while away one weekend with my girlfriends I finally decided to give it a try and I've been hooked ever since. Not good since a Grande at Starbucks will cost you $4.80.

So after enough nagging from my husband to stop spending so much money on drinks, I scoured the internet for homemade recipes (and when I say scour, I mean I went to Pinterest and searched Google). After a little experimentation I have finally made the recipe my own. It's quick, easy and my husband likes it too!

Let's get started.

You'll need:
  • Earl Grey Tea Bag
  • 1 tbsp. of vanilla syrup
  • 1 cup of boiling water
  • 1/2 cup of heated milk
  • Cinnamon (optional)
Directions:
  1. Put the vanilla syrup in a mug and add the tea bag.
  2. Pour in boiling water and let the tea steep for 5 minutes.
  3. In the meantime, heat the milk in the microwave for 55 seconds and froth with a milk frother (works best) or a whisk.
  4. Using a spoon to 'hold' the froth, pour the milk in the tea and add the froth on top.
  5. Add a dash of cinnamon on top if desired.
That's it! There is really nothing to it. If you're going to make these often, I would invest in a hand held milk frother. I bought mine at Home Outfitters for only $9.99!


This latte also pairs nicely with homemade apple cinnamon muffins - but that' a post for another day.

Enjoy!

- Lisa

Thursday, April 25, 2013

Lemon Chicken, Green Bean and Potato Bake


My husband and I have been trying to eat a little healthier so I've been experimenting more with our dinner options. Now we're not too adventurous with food, and in fact, our normal dinners consist of a lot of fajitas, grilled cheese and soup, and pasta. Very exciting stuff folks.

So what is my solution? Well, I came up with a one-dish lemon chicken, green bean and potato bake. I remember seeing something like this somewhere but for the life of me I can't remember!

It was quite delicious - and it's healthy too!

Ingredients:
  • 2 boneless skinless chicken breast,s cut in halves
  • 1 lemon, sliced
  • 1 1/2 cups of green beans
  • 1 lb of red potatoes
  • 1/2 tsp of pepper
  • 1/4 tsp of salt
  • 2 tbs of olive oil
  • 1 - 2 gloves of garlic, minced 
Directions:

1. In a medium prep bowl mix olive oil, garlic, salt and pepper until well combined.
2. Place sliced lemon in the bottom of a lightly greased 9 x 6 pan. You do not need to cover the whole bottom, just spread the slices throughout.
3. Place green beans in the middle of the pan and on top of the lemon.
4. Dip the chicken in the olive oil mixture, making sure that it's well coated. Place the chicken on top of the green beans.
5. Dip the potatoes in the rest of the mixture and spread the potatoes on the sides of the pan.
6. Drizzle the remaining mixture over everything.
7. Bake at 350 for about an hour or until chicken is cooked through and potatoes are soft.


Let me know what you think of this. I hope you enjoy!


Sunday, February 10, 2013

Homemade Spaghetti Sauce Recipe

In my household, we're big pasta fans. Any pasta will do really, but we're pretty big on homemade sauces. I found a recipe from www.allrecipes.com, but after making it a few times I've finally adapted it to our taste.

This recipe makes a large batch; enough for an army of 8 to 10. We are a family of 3. We eat a lot of pasta - just don't tell my new personal trainer that.

Having said that, it is pretty healthy. It has a ton of veggies and we use ground turkey instead of ground beef. Delish.

Here is the recipe (from memory :) )

Stove top: Use a Wok or other large skillet, cook time: 1.5 hours

2 tbsp of oil
1 whole green bell pepper
2 cups of chopped celery (about 4 stalks)
2 cups of chopped carrots
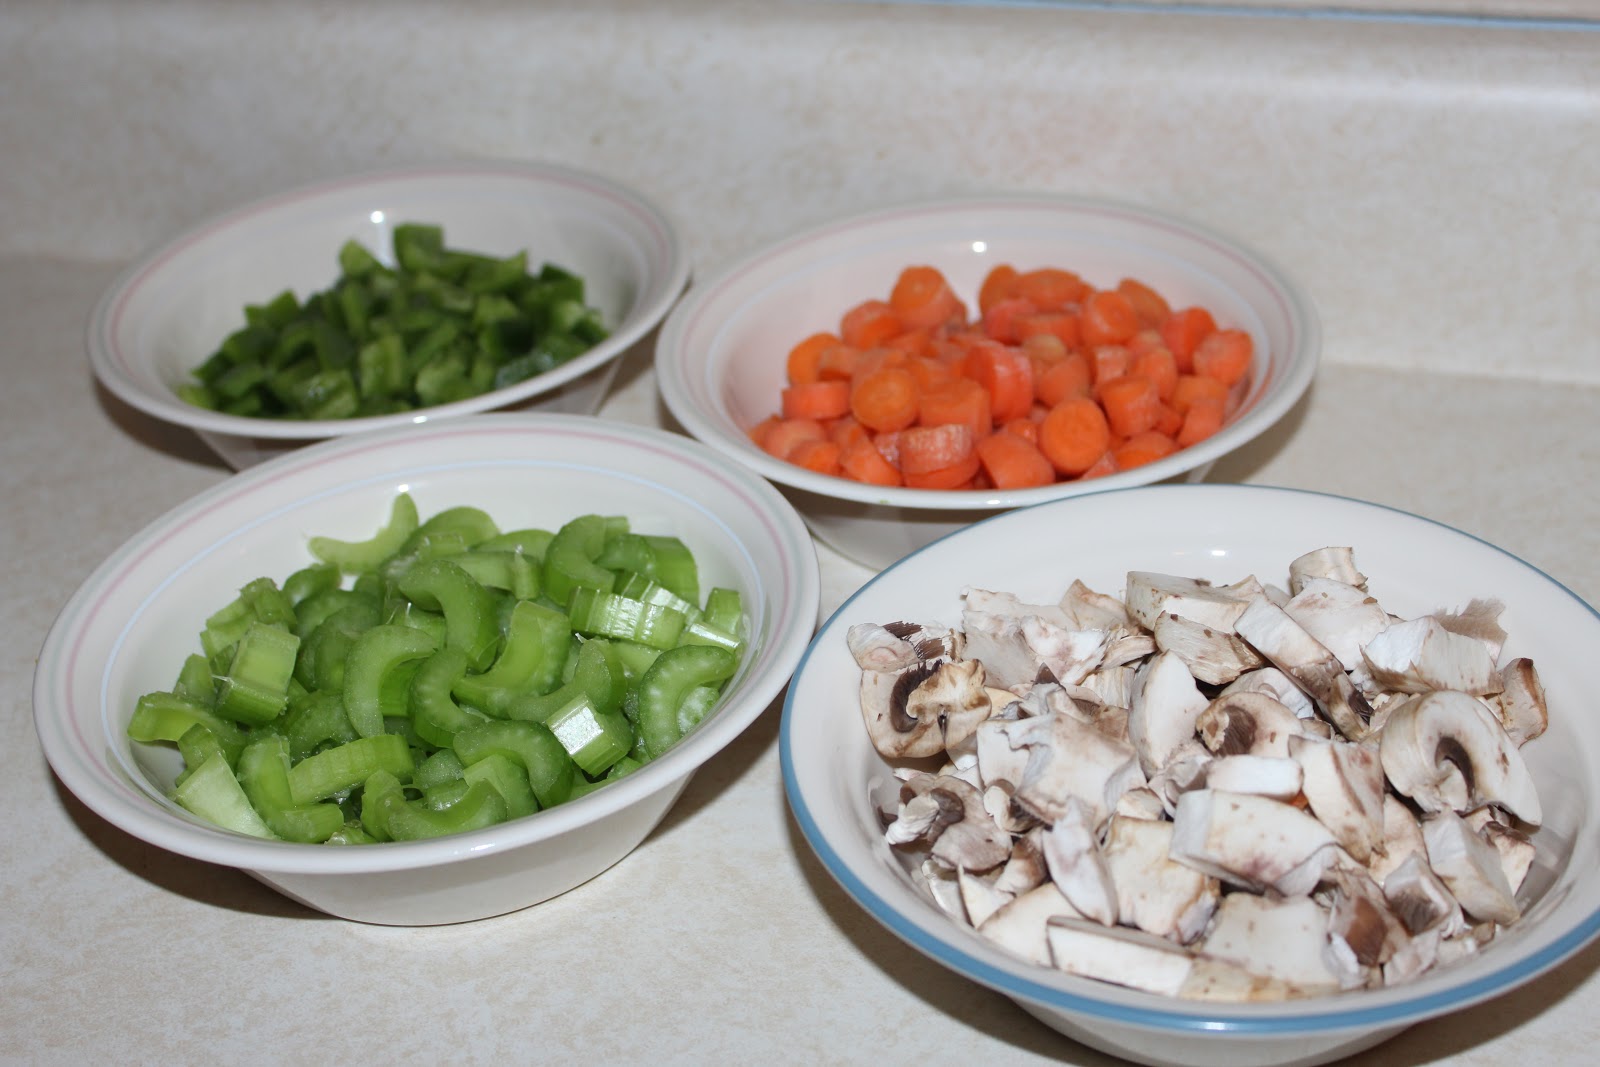
2 cups of chopped mushrooms
1 tsp garlic powder
1 tsp ground black pepper
1 450 g pack of ground turkey
Pinch of thyme
Pinch of basil
1 can of stewed tomatoes, 14.5 ounce/796 mL
2 cans of tomato sauce, 15 ounce/680 mL
2 cans of tomato paste, 5 ounce/156 mL

1. In a large skillet over medium heat, saute carrots, celery, green bell pepper and garlic in oil until the peppers are tender. Add the mushrooms, ground turkey, thyme, basil and ground black pepper; fry stirring frequently until the turkey is done.

2. Add the can of stewed tomatoes with liquid and reduce heat; simmering until the tomatoes are soft and begin to fall apart. Add the tomato sauce and stir; add tomato paste to thicken. Simmer on very low heat for about 30 minutes or longer depending on how crunchy or soft you like your vegetables, stirring occasionally. Serve over you favorite pasta.
Preparation is key!

Fresh vegetables, yum!

After adding the stewed tomatoes.
Finished product.

I really hope you like this as much as we do. Of course, it can be made without meat and you can use any vegetables you would like. This also freezes well so if you only use it for one meal, freeze the rest for later use.

Enjoy!

Friday, December 28, 2012

Slow Cooker Beef Stew

So, we're well into the winter season now, and nothing warms my family up more than a nice hot bowl of homemade stew. This stew can be made in the slow cooker, which is my preference, or it can be made on the stove top.

It is chalk full of meat and vegetables, so it is good for every member of your family. Although I do have to admit that my toddler isn't a big fan!

I have adapted the original recipe I found here. Follow the directions below for a truly delicious meal. You will not be disappointed!

Ingredients:
1 small bag of baby carrots. If they are too large, I cut them in half.
3 potatoes, peeled and cut into cubes.
2 lbs of pre-cut stewing beef (1 1/2 sm. packages).
1 cup of beef stock
1 tbsp of Worcestershire sauce
1 tsp garlic powder
1 bay leaf
1/2 tsp on salt
1/2 tsp of pepper
1 tsp of paprika
1 sm. onion, diced
4 celery ribs, cut up
2 - 3 tbsp of Bisto Gravy Mix, Beef flavour :)

Directions:
Place all ingredients, except the Bisto, in the slow cooker in the order listed above. Mix to ensure all spices are blended. Cook on slow for 4 - 5 hours (or longer depending on what slow cooker you are using). During the last 5 - 10 minutes, add the Bisto one tablespoon at a time, mixing well after each addition. Add as much as you'd like depending on what thickness you like your sauce. I find no more than three tablespoons work. Without the Bisto, I find the stew to be too watery.

Remove bay leaf, serve with warm buns and enjoy! 

Please let me know how you like it!

Monday, May 28, 2012

Summer Punch

I threw a mini Birthday/Bachelorette Party for my sister who just turned 30 and is getting married next month. We had a mobile spa come to our house where we got manicures/pedicures, had some drinks and appetizers. We then went out for dinner and then headed to Splitsville, our local bowling alley that also an arcade and bumper cars (so fun!).

For drinks during the day, there was some alcohol involved, but I also made a nice Summer punch, inspired by a recipe found on Pinterest, for everyone to enjoy. It's very refreshing and light; a nice party punch.

(The punch is much lighter than this, it just looks darker because of the bowl I used, Tupperware Chip & Dip)

Ingredients:
  • 1 sm. carton (approx. 900 ml) of chilled pineapple juice
  • 1 - 1.75 L of chilled lemonade
  • 1 litre of club soda, or more to taste
  • Ice cubes
  • Fresh assorted fruit (strawberries, orange slices, etc.).
Directions:
In a large pitcher or punch bowl, mix together juices and add club soda and mix slightly; add ice and fruit. Serve and enjoy!

You can also serve with individual fruit skewers if desired.

If you happen to have the same bowl I used, you know it comes with two small containers that attach to the side. I used these containers for ice and it worked beautifully to keep the punch nice and cold without diluting it.

Happy Summer!

- Lisa